The BEMI KNX Planning Tool labeling feature allows you to create professional looking labels for switches, sockets, push-button sensors, RCDs, etc.
With its easy-to-use drag & drop interface, you can easily design customized KNX labels which can f.ex. include your company logo and a combination of symbols and text for easy identification by users.
_______________________________________________________________________________________
How to Easily Print Professional KNX Push-Button Labels with KNX Tool.
-
First you have to make a template with your preferred design, then you link this template with your pushbutton.
-
Every time you add this pushbuttons to your project you can quickly add icons and text to the label with the design you have chosen.
-
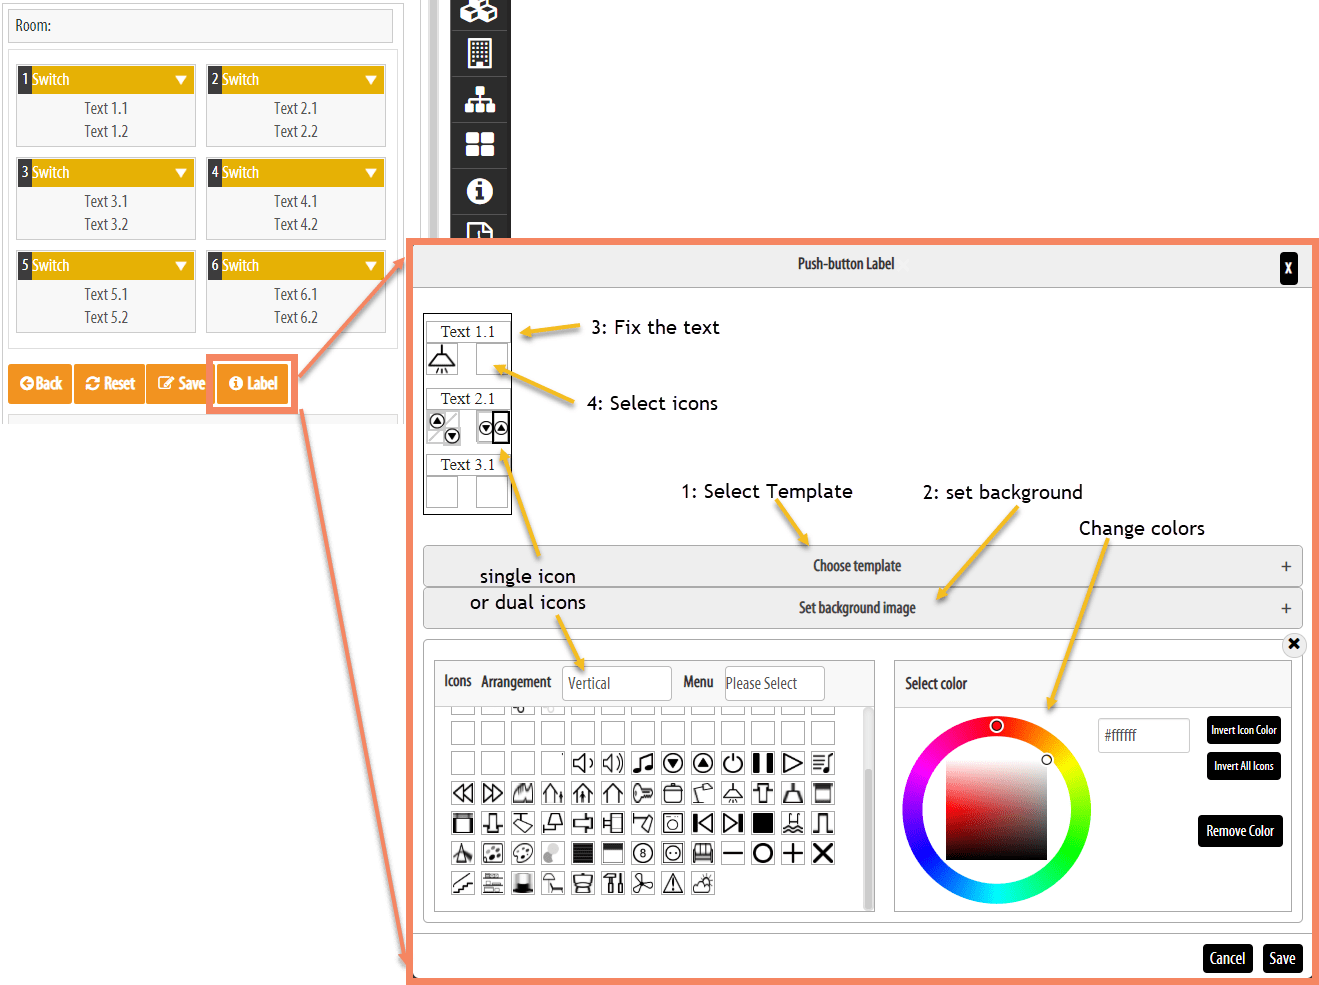
When you press on the “labels” button it will open a popup window with the template as background.
-
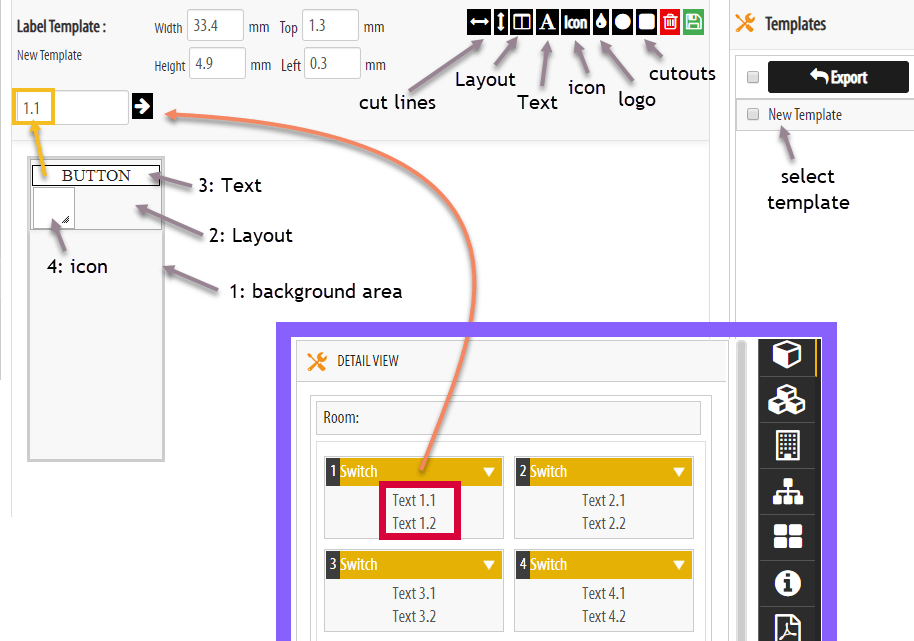
The text will automatically be taken from the push-buttons, but this can be changed if you like.
-
When you are happy with the text, you select an icon placeholder and select one of the icons you have added to the system. You can also change colors and background picture.
-
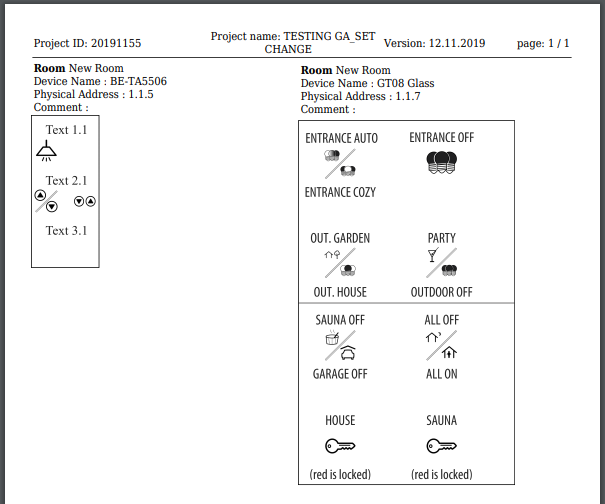
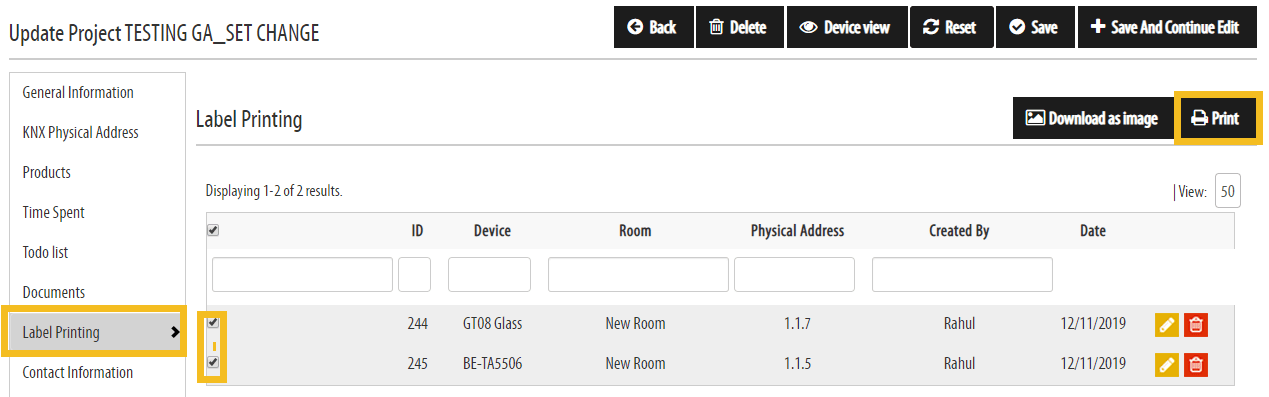
When you are done you select all labels and print them as a PDF document — now you have quickly made stylish and professional push-button labels for your KNX project.
[NOTE: There is also a way to add your own icons to the tool so you can use when making the labels.]
_______________________________________________________________________________________
-
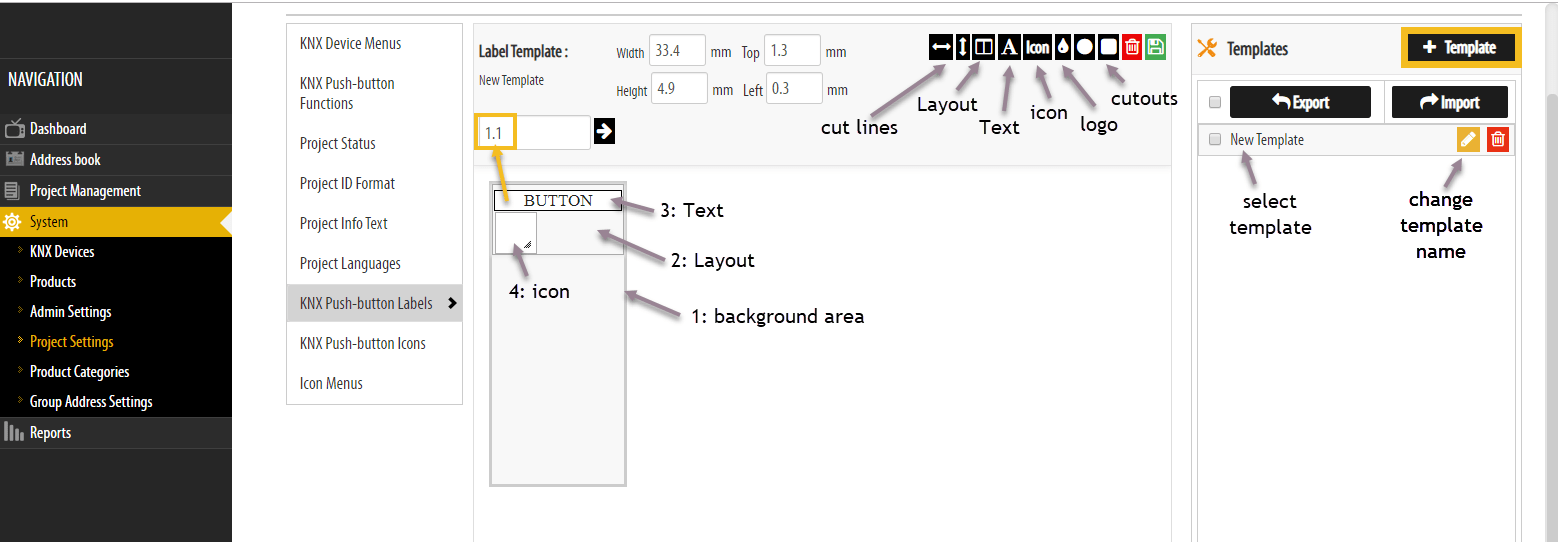
First you need to adjust the template background area to fit the size of your pushbutton.
-
Next step is to add a ‘Layout’ area for each button. This is important so the system knows from where to take the text automatically.
-
Select the Layout area and click on the ‘add Text’ icon to add a text area. Set the size and position. Notice the index number for the text area! You can change this index so it takes the text from where you want it to.
-
Make sure the Layout area is still selected and click on the ‘add Icon’ icon to add an icon placeholder. Set the size and position.
-
You can also add vertical and horizontal cutting lines if you are going to cut the labels.
-
We also recommend adding a ‘Branding logo’.
-
Use the cutout if the pushbutton has a LED, this will make a clear area in the background picture.
[TIP: Use the With and Hight measurements to keep the same size on all text areas and icon placeholders. It’s also useful to use the Top and Left numbers to align all areas. The trick here is to always make sure you have the right object selected when you use the mesurements.]
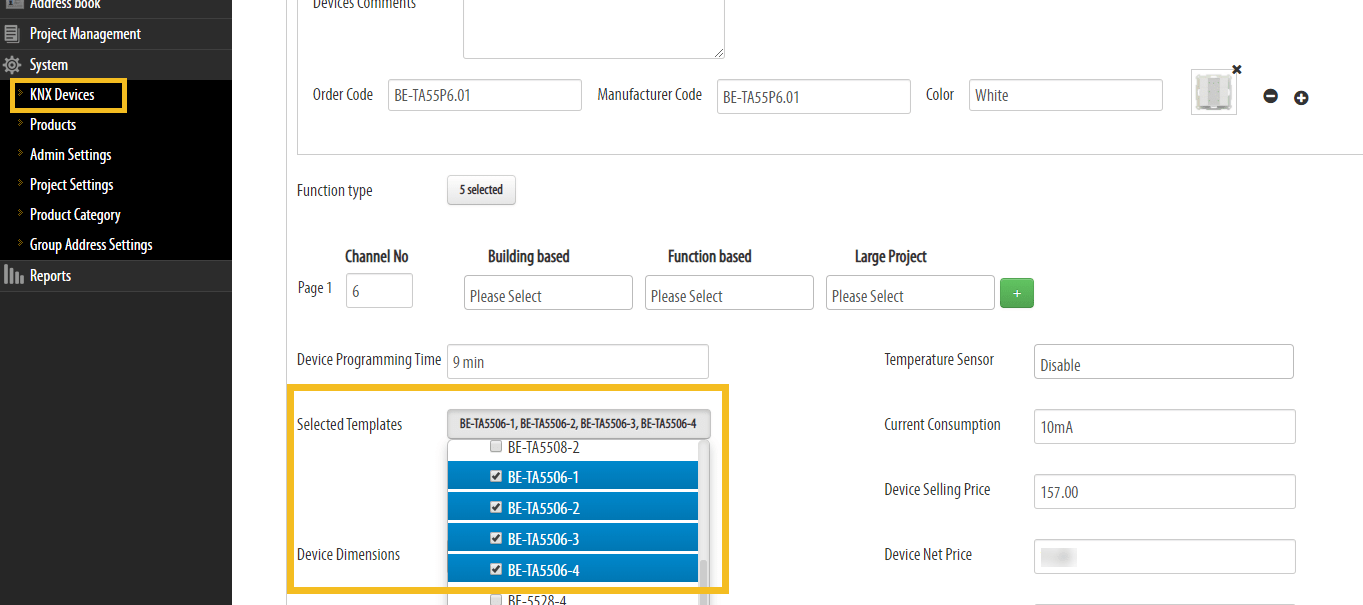
[NOTE: You can make multiple templates with different designs for your pushbutton.]
Also notice the numbering with Text placeholders. They are numbered x.y where x is the button (1,2,3 etc.) and y is row 1 or 2 (e.g. 1.2). This is used for the system to know from where you take the text for automatically filling out the text.
_______________________________________________________________________________________
_______________________________________________________________________________________
Create Labels.
When you have configured the pushbutton, then press the Label button and it will open a popup window.
-
Start with selecting the template if you have multiple designs.
-
The text should be filled out automatically but correct it if needed.
-
Next step is to select the icons, you can have a single icon or if it’s a multiple functional button you can select two icons in one placeholder.
-
You can also select a background color or picture.
-
Press save to save the label for the specific pushbutton.

You will have the choice to print the Labels in a single column or multiple columns to save paper.
The PDF will open in the browser, press the download button to save the PDF with your files.