Function Based KNX Group Address

Setting up a Function Based Group Address structure

To set up your Group Address structure, go to System > Group Address Settings:

The first page you’ll see is the General Information tab.

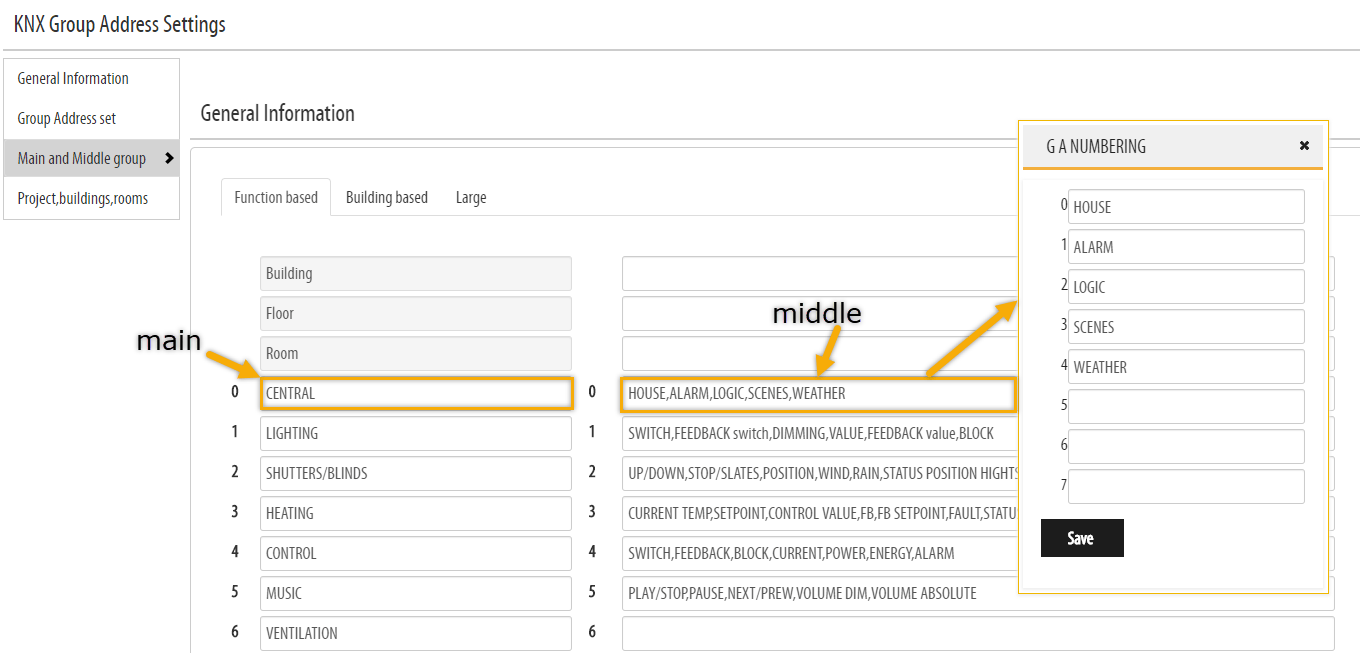
Here you can change the names of your GA profiles. You can have a total of 3 different GA profiles. Update the profile names by clicking .

GA profiles allows you to create multiple different GA structures. Depending on the size and type of project, you can then choose the GA structure that works best for the project.

[TIP: When naming GA profiles, you can use descriptive words such as ‘Residential’, ‘Office’, ‘Hotel’ etc. to .]

_______________________________________________________________________________________

Next, create the Main and Middle group structure in the Main and Middle group tab.

First, make sure you have selected the right GA profile from the 3 tabs on the top of the page.

Fill in function categories in the Main group structure (to the left). Ex. Lighting, heating, control, ventilation etc.

Then fill in the specific sub functions in the Middle group structure. Ex. Switch, alarm, dimming etc.

_______________________________________________________________________________________

In the Group Address Set tab you can create different GA sets that you can link to your devices. These GA sets will be mapped to the main and middle structure.

To create a GA set, go to System > Group Address Settings > Group Address Set and click .

Fill in the general information first:

Name = Name the GA Set

Output print format = Set the text for the Group Address, you can use plain text or prefix for indexing like %s which will set the subgroup name or the %t for the device tag given for each device in the actuator report page. Example “%t-%l %c, %r %n %s” = “Tag – Channel number Connection number, Room name Channel name Subgroup name”.

Start with = Set your start number from where you want your GA to start. Ex. 1 or 10. Default is 0.

Same Sub Group Number = Check this to keep the sub group number the same for the whole GA set. Eg. in case you use a GA structure based on functions and middle groups as sub-functions. Example: 1/1/5 SW, 1/2/5 FB, 1/3/5 DIM, 1/4/5 VAL, 1/5/5 FB_VAL.

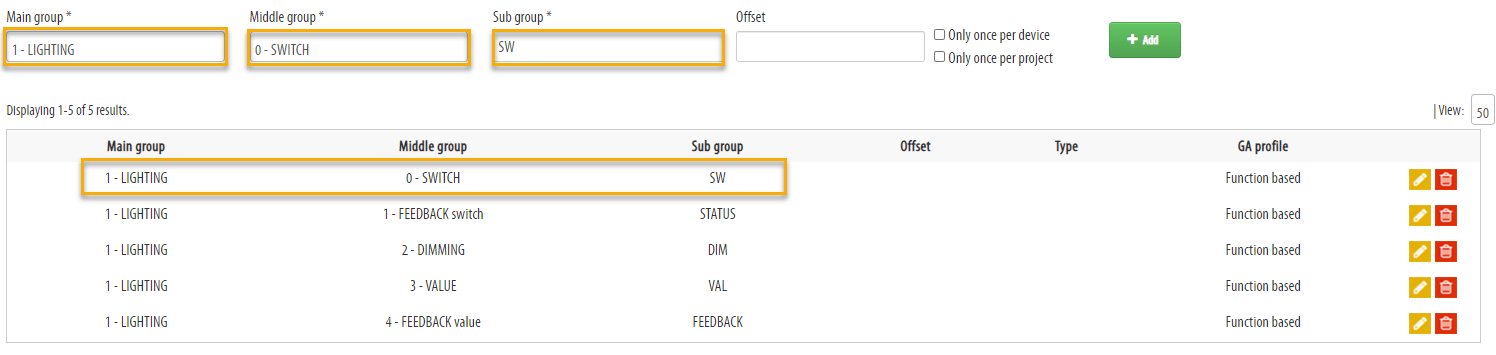
Then start adding the group addresses.

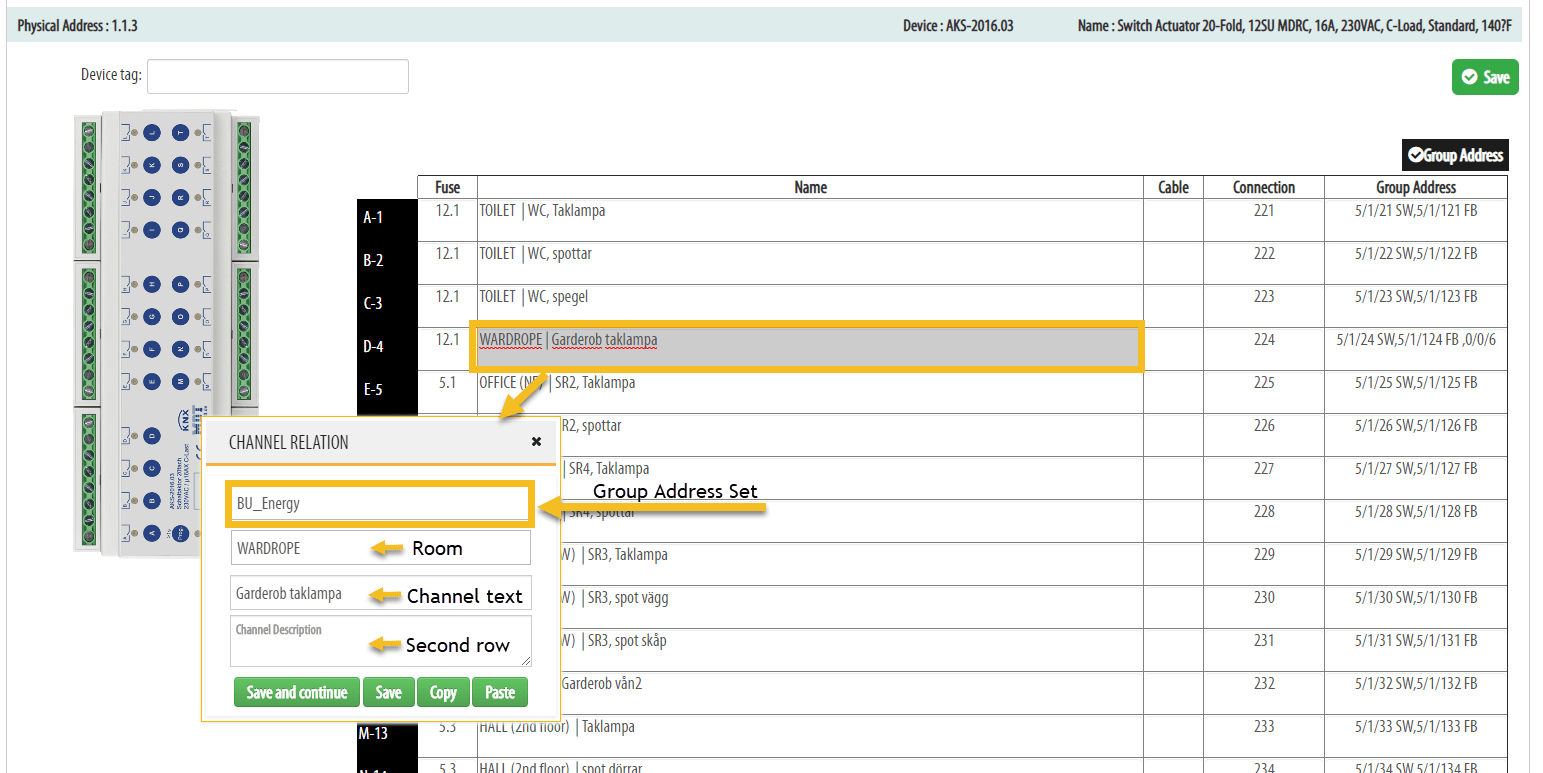
You do that by choosing a main and middle group from their respective drop-down menus and then writing in the sub group name and offset (optional).

Offset allows you to make individual starting indexes within the GA set. The offset is separate from ‘Start with‘!

Check ‘Only once per device‘ if this Sub group should be generated only once for this device. E.g. a device error Group Address should only be generated once whereas the SWITCH should be generated for each channel.
Check ‘Only once per project‘ if this GA should be generated only once for this project. E.g. a global alarm Group Address.

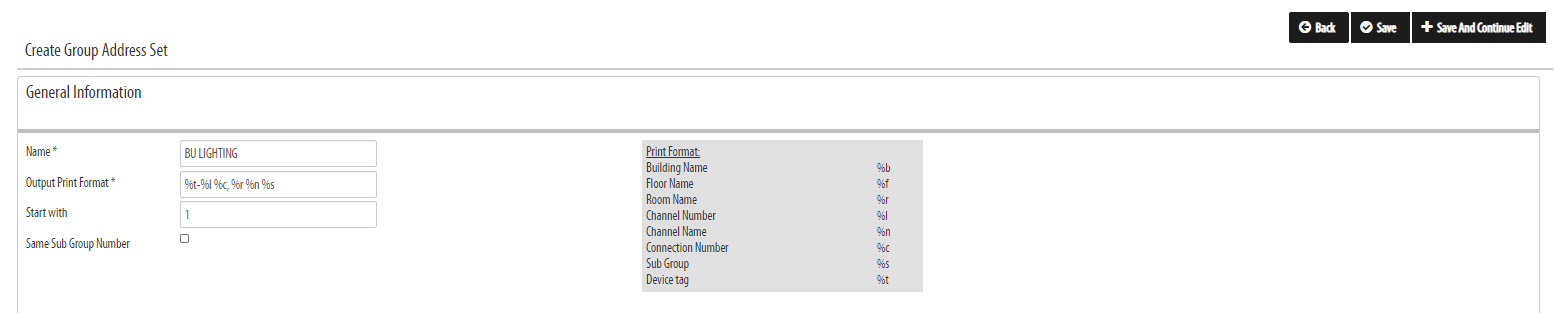
When all information has been added click .

Add the rest of the sub groups the same way to complete the GA set. Remember to  when you are done.

Once the GA Set is saved you can drag and drop the sub groups in the list to rearrange the order.

_______________________________________________________________________________________

In the Project, Building, Rooms tab, you can link GA sets to a project or a building structure.

This is useful if you have a specific sets of group addresses you always have in your project. You might f.ex. want a scene for every room and fire alarm, Time and Date for the project as well as other project specific group addresses.

_______________________________________________________________________________________

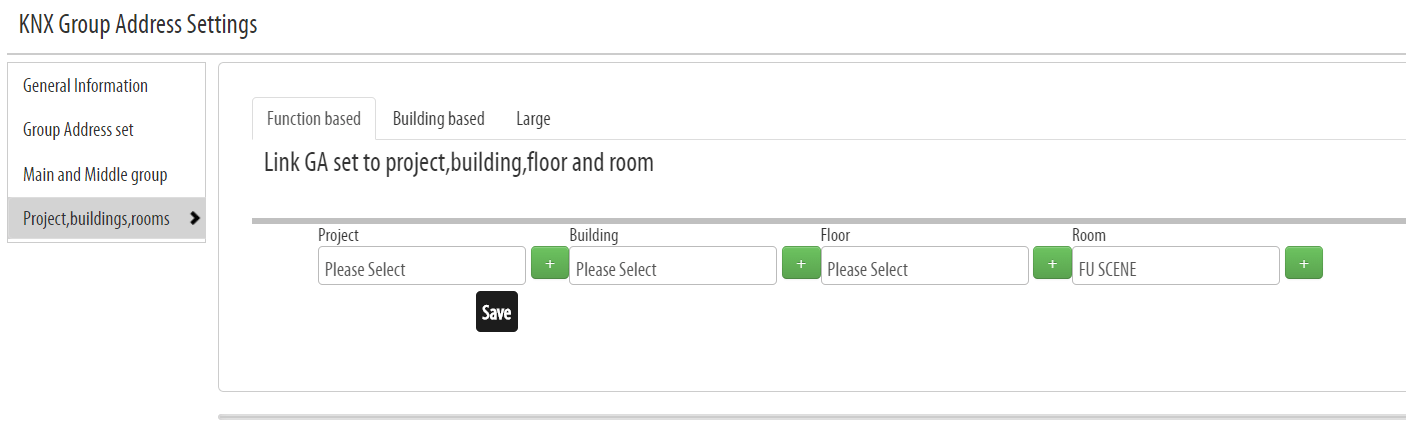
When you have created your Group Address sets, it’s time to link them to your devices.

To link a GA set to a device, open the KNX Devices page (System > KNX Devices).

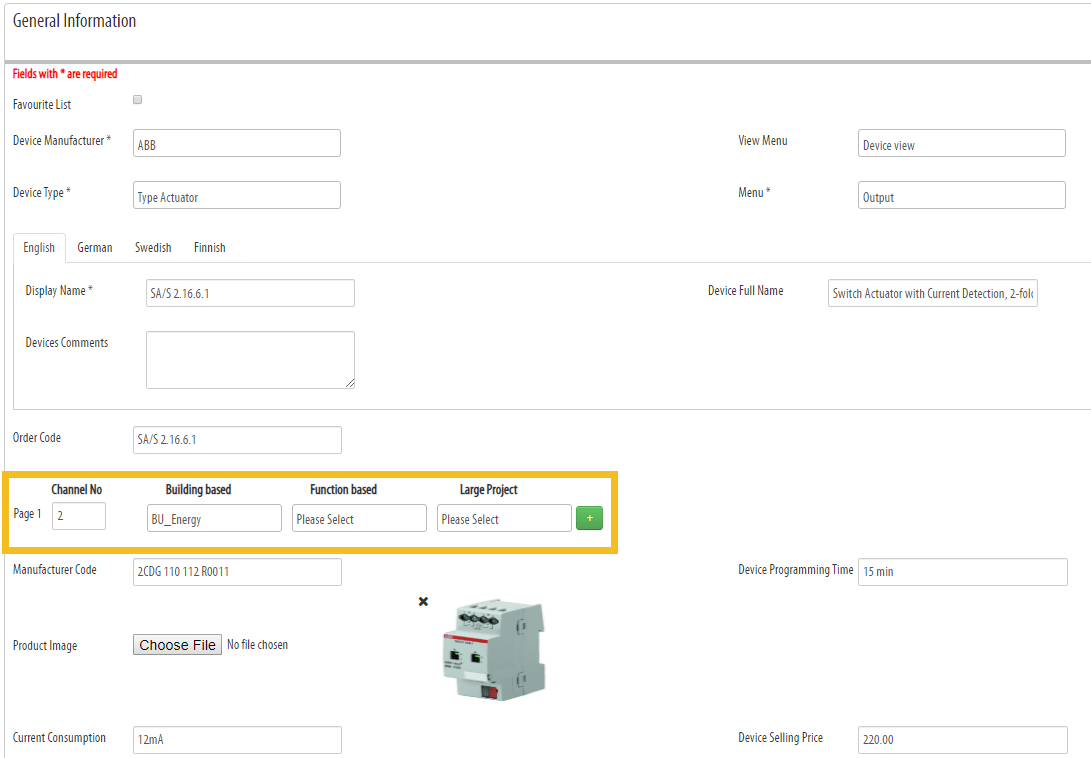
Choose a KNX Device from the list and press the edit button . This will open the Device Setup page. Scroll down to where you set the channel numbers for the device.

You can link one GA set for each GA profile. Select the GA sets from the drop-down menus.


NEED SETUP ASSISTANCE?

Click the link below to schedule a free live video appointment where we will show you how to setup and customize the KNX TOOL for your current projects.