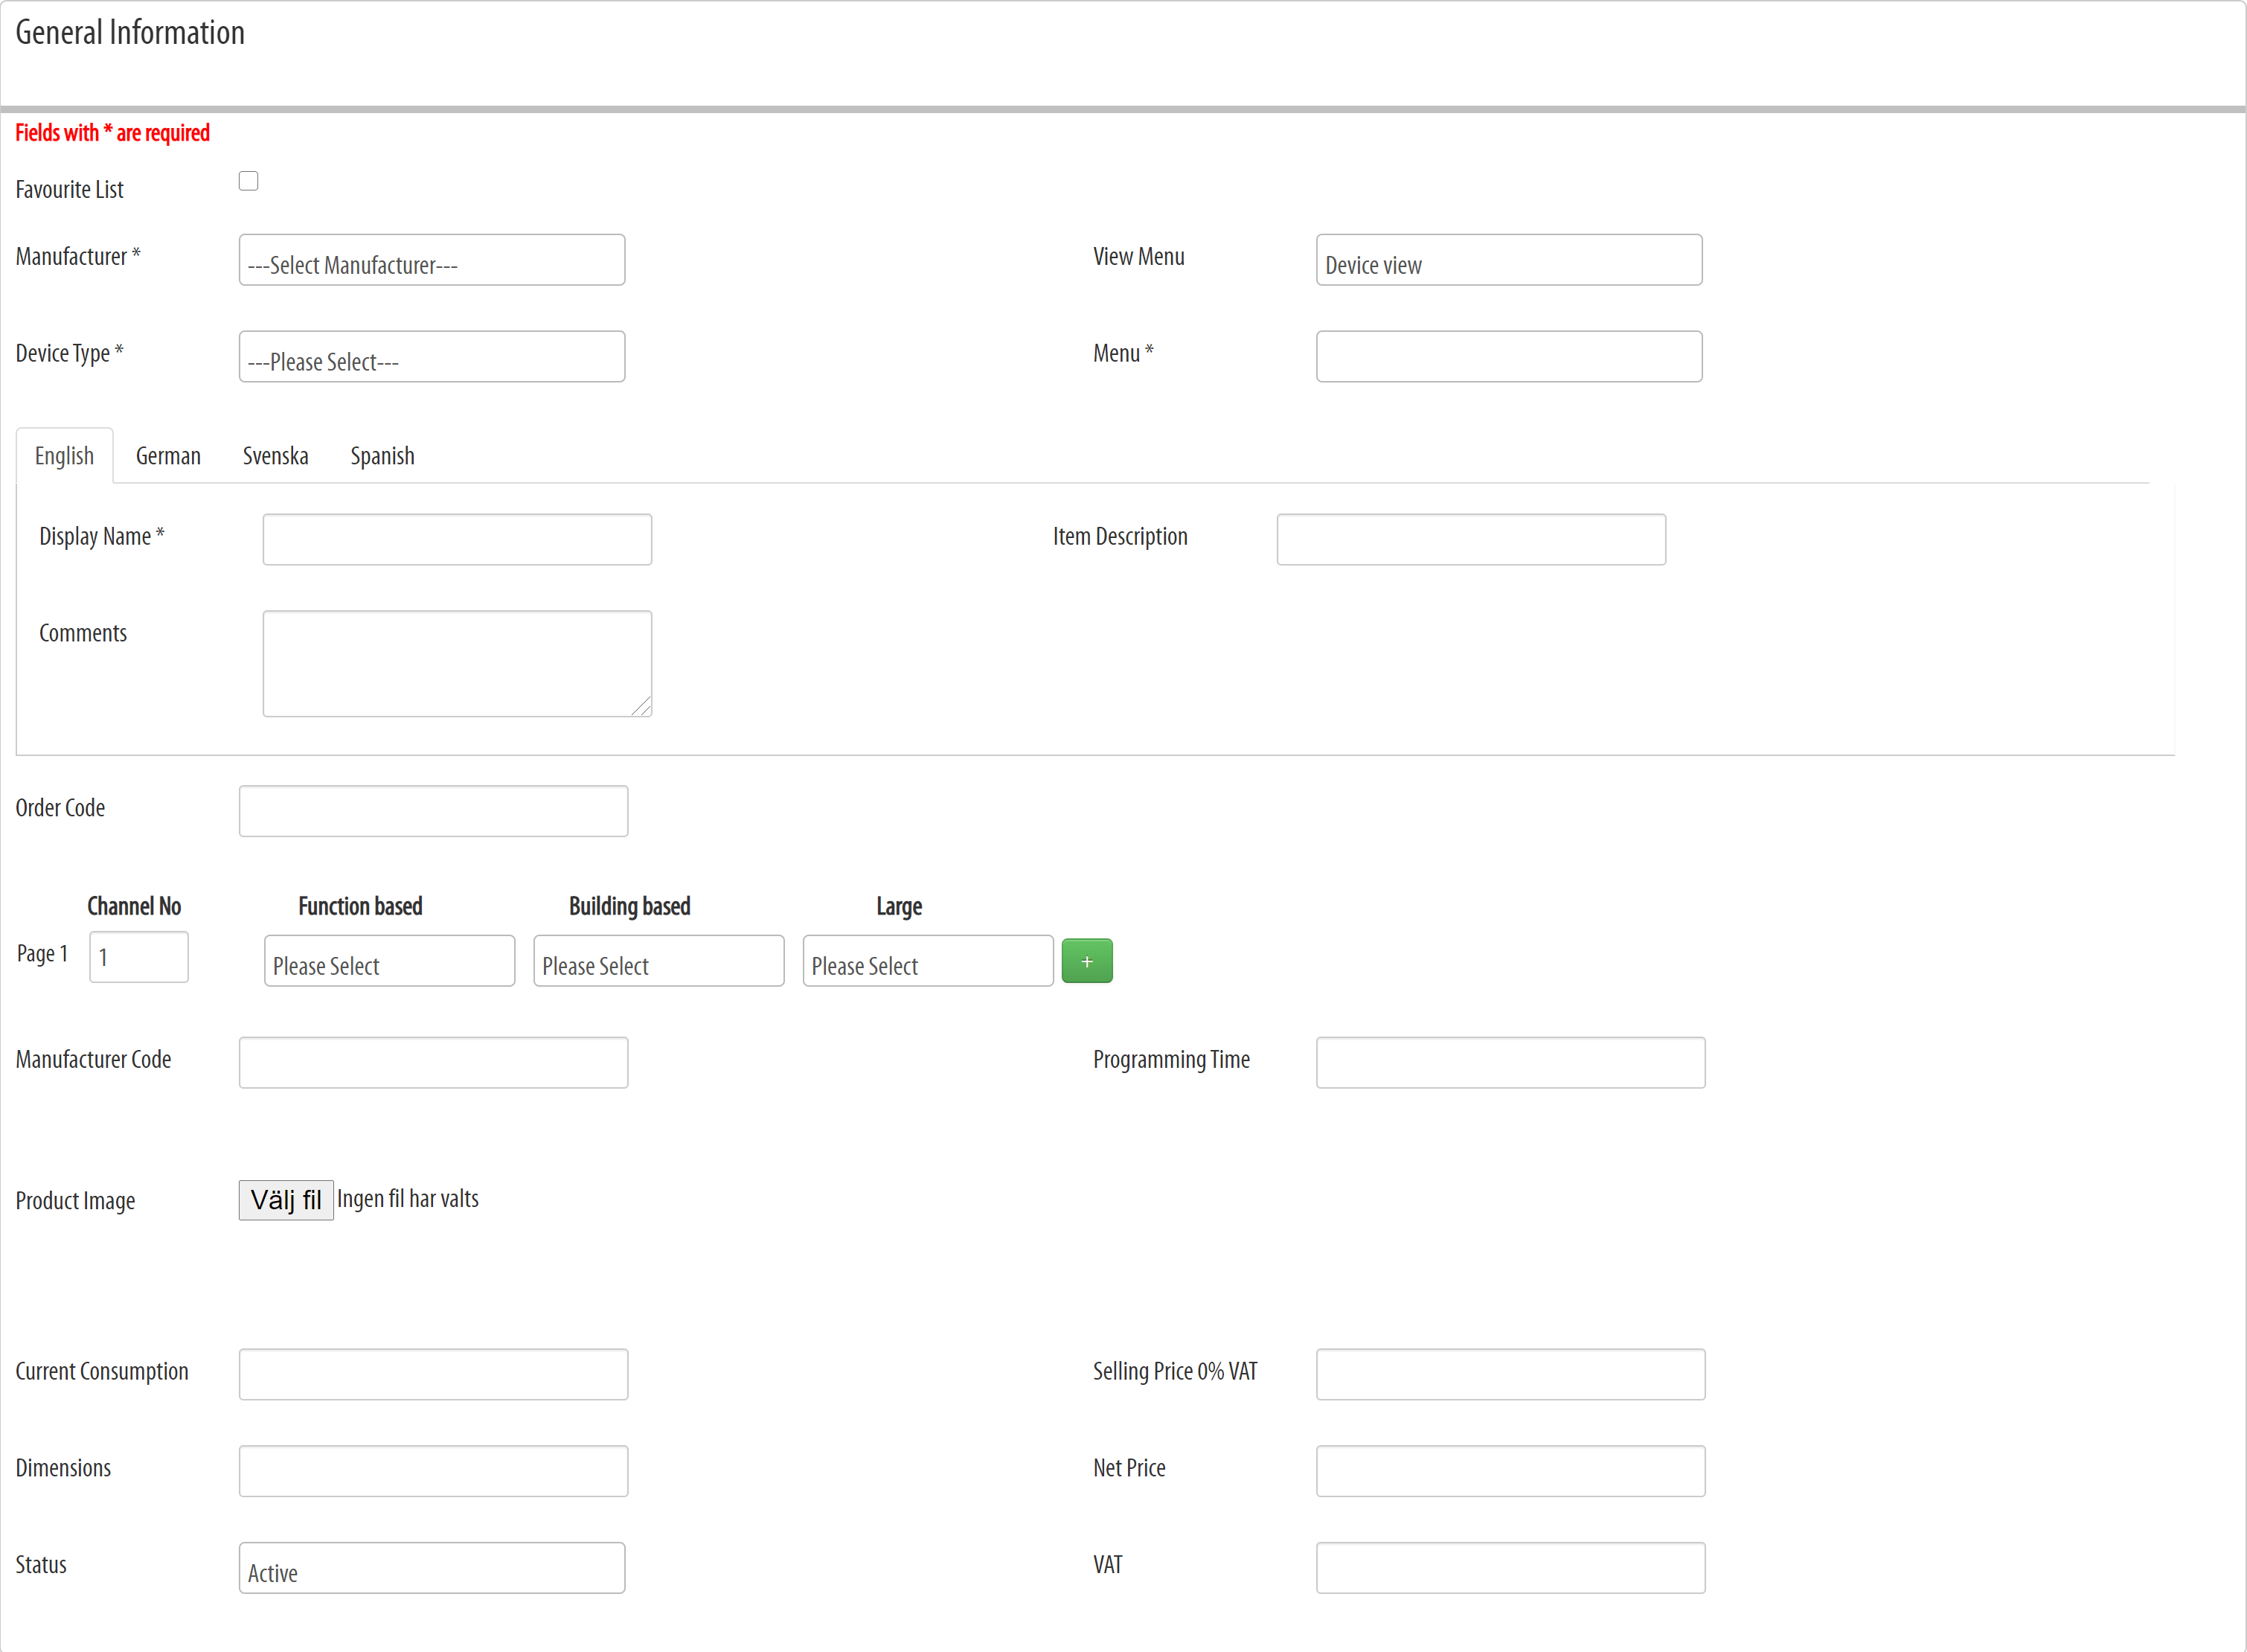
Device setup page. Here you can edit a device’s details.
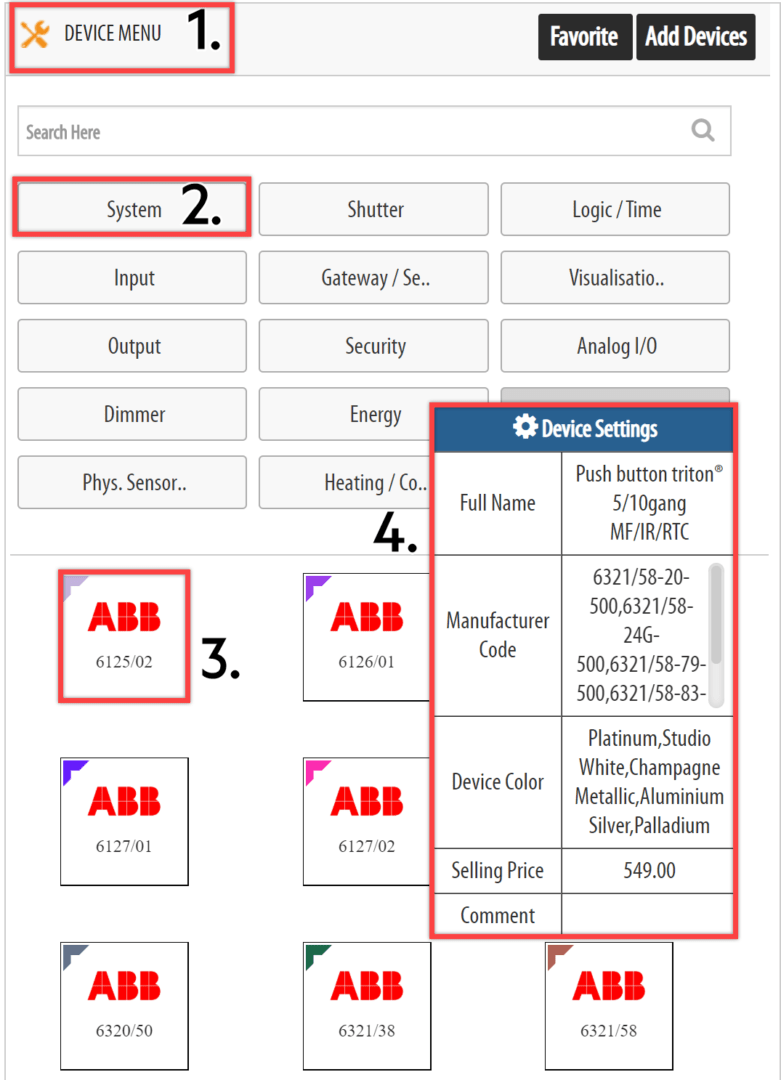
The Online Catalog (similair to ETS) makes it easy for you to download new devices. Select a device from the Online Catalog and the device data is filled into the device information below.
Add your custom information Order Code, Programming Time, Selling Price, Net Price, Label Template etc. You could also change Display Name, Full Name and Comments of the device to your own needs for the different languages. Once you are finished click Save to return to the KNX Devices page or Save and Continue if you would like to add another device.
[NOTE: If you can’t find your device in the Online Catalog, you can send us a message and we will add the device to the Online Catalog as fast as we can. You are also able to add the device by filling in all the information about the device yourself. You can even upload a picture.]
- View Menu
- Menu
- Display Name
- Details

Some Device Types have extra fields that are type specific.
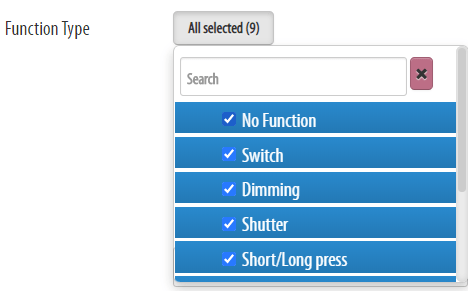
For Push Buttons and Displays you have to select the Function Types you want, f.ex. long-press, scene and dimming. Only the ones you select will be available when you configurate that device.
[NOTE: The devices that you download from the Online Catalog typically already have function types selected.]
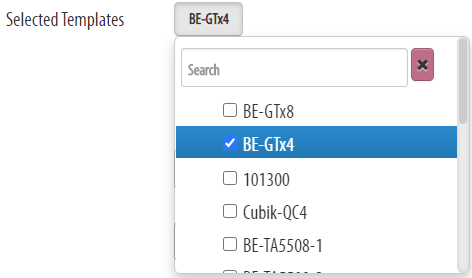
Push Buttons also have the Label Printing function (only for Business and Premium subscriptions).
Remember to select the label template for the device. You can learn how to easily create custom labels for devices here.


Favourite List= Add your most used devices to your favourites. When working on a project you can then filter for favourites in every menu category.
Manufacturer= Select the product’s manufacturer from the drop-down menu. New manufacturers are added in Address Book > Manufacturers.
Device Type= You can organize your devices according to types. The type you choose for a set device will determine f.ex. in which report (actuator or function description) the device will be printed and how it will be presented. Read more about Device Types here.
View Menu= (1.) Select “Device View” if the product is a device and “Functional View” if the product is a function. Device View and Functional View are different menus which appear on the drawing board of every project.
Menu= (2.) Both the Device View and Functional View are further broken down into submenus f.ex. lightning, security. Choose the most fitting submenu from the drop-down list.
Display Name= (3.) The short name you see on the “box” on the drawing board when selecting a device or function.
Item Description (Full Name)= (4.) A description of the device.
Comments= (4.) This comment is a personal aid and can only be viewed by you. The comment will not be printed out on any report.
Item description= The longer name that will be written on top of each device in the reports.
Order Code= The device identity code you need to order the product. Order code can differ from manufacture code if you buy the device from a reseller.
Manufacture Code= (4.) The manufacturers product code.
Programming Time= The approximate time it takes for YOU to program the function (this gives you a guideline of how big the project is and how long it will take).
Product Image= Upload an image of the product. The image will be printed on reports.
Current Consumption= How strong the current should be for the device to work.
Selling Price= (4.) The price you will charge your customers for the device without VAT applied.
Dimensions= The device dimensions.
Net Prize= The price you set for the device.
Status= Most commonly set to “Active”. Set to “Inactive” f.ex. if the device is outdated and won’t be used for new projects. The device is still available in old projects but is hidden in new projects.
VAT= The VAT is calculated automatically based on the entered Selling Price and the Local VAT value which you entered in the Admin Settings under General Information.


