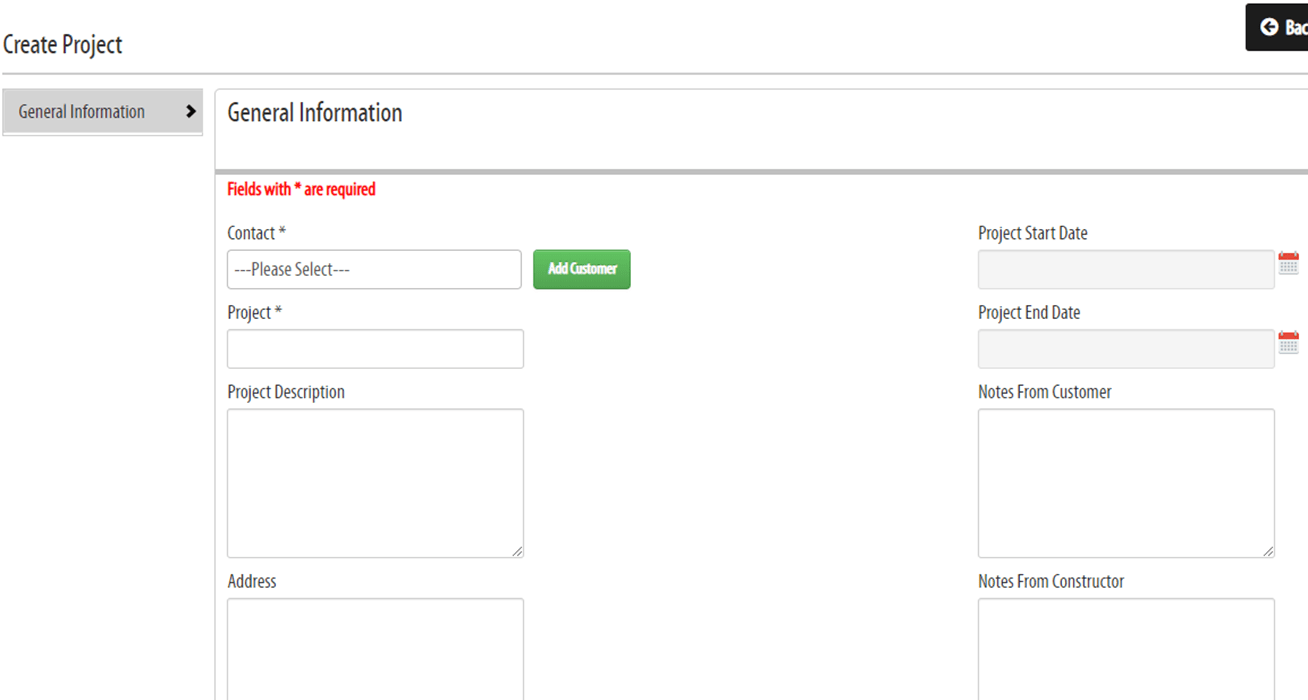
To begin a new project with the KNX Tool, go to Project Management > Add Project.
A page will come up where you can fill in general information about the project. Fill in the required fields: contact, project name and status.
We also recommend you fill in a project description and choose the language for your project. Use the list below as a reference if needed.

1. Fill in the fields
Contact: Select the contact of your customer from the list. Add the contact to the Address book if it’s missing.
Poject: Enter the name of the project
Project Description (optional): The text which you are entering here will be printed in the Function Description of the project.
Address (optional): Enter the address of the project building.
E-mail (optional): E-mail address of the customer.
Phone (optional): Phone number of the customer.
Project Milestones (optional): Enter milestones for the project.
Date (optional): Enter the adding date of the project (default: today’s date).
Header (optional): Project header information.
Project Language (optional): Set the project language – the information of the devices in the project will be printed to the Function Description/Reports in this language.
Project Start Date (optional): Project starting date.
Project End Date (optional): Project ending date.
Notes from Customer (optional): Enter notes from the customer here.
Notes from Constructor (optional): Enter notes from the constructor here.
Status: Set the status for this project (Note: you can define you own Status categories at System / Project Settings / Project Status).
Description (optional): Enter an additional description for the project (for internal use).
Now you are ready to start building and your KNX project. Click the title of the project in the project list to open the project.
Check out the articles in the getting started section to learn how to build your project.
Tags: add project, new project, Project


