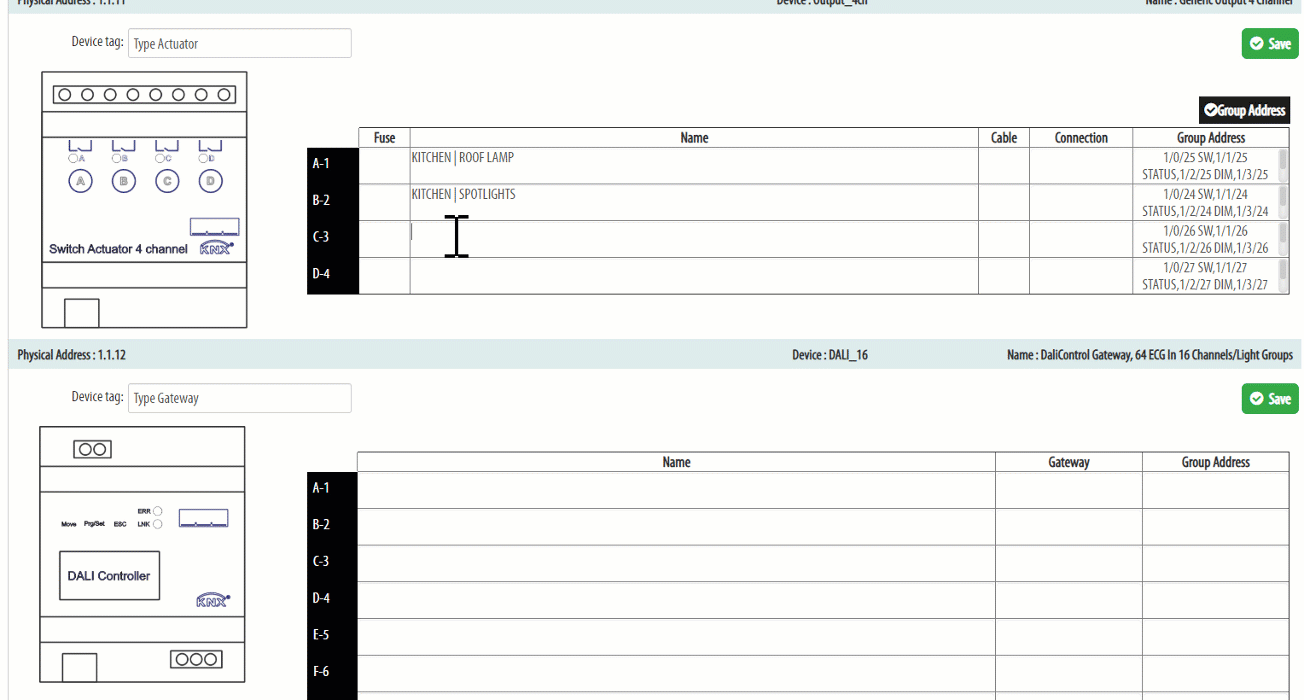
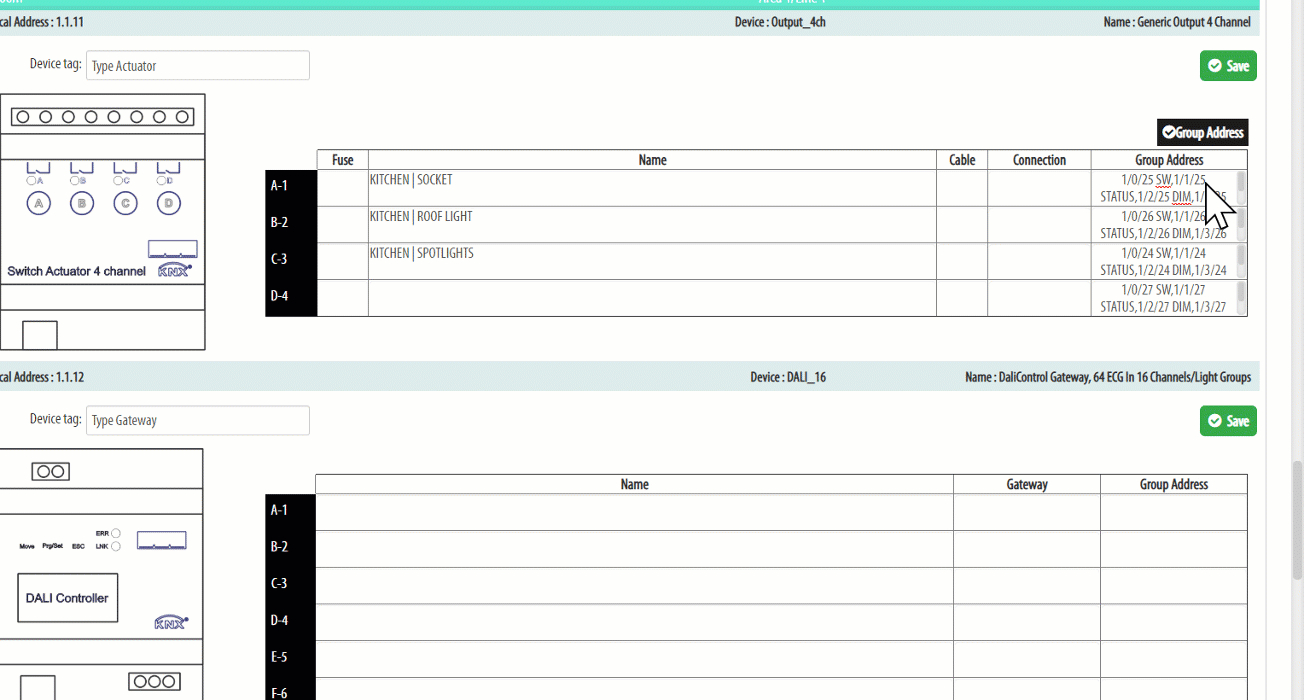
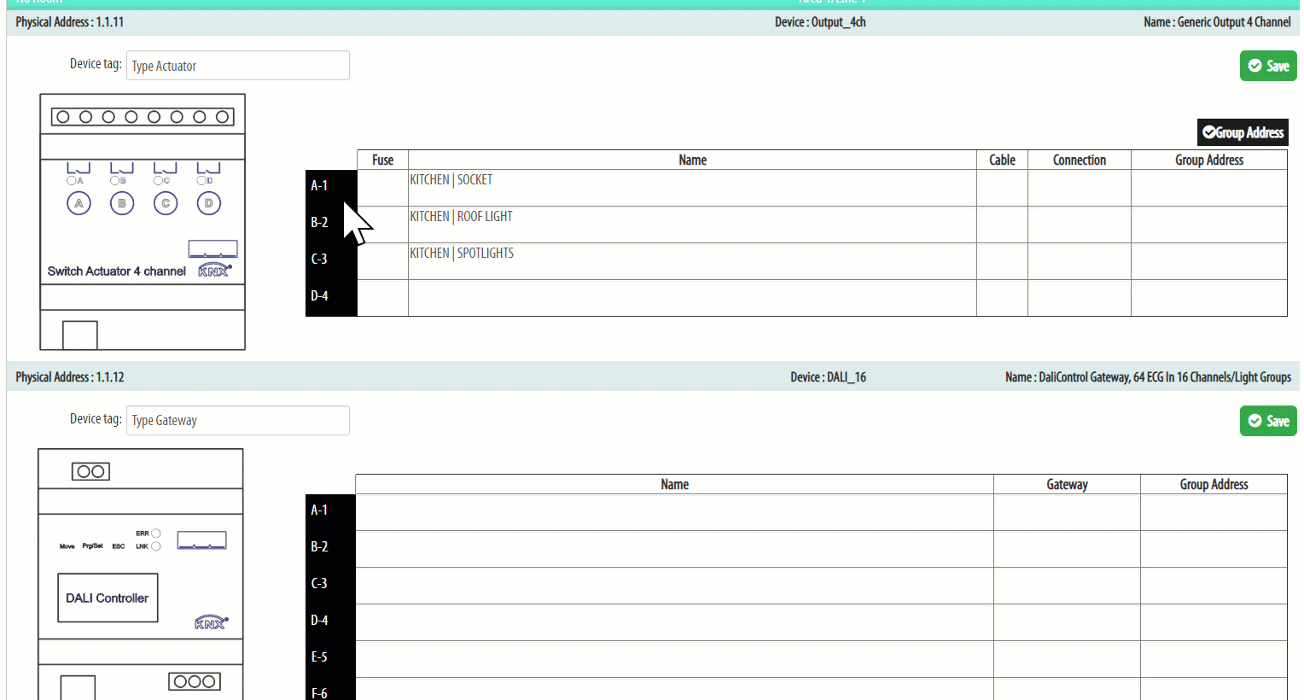
Actuator Report

Actuator Report

The Actuator Report lists all of the actuators (type Actuator, Gateway, General and Sensor Relay devices) that go in the Electrical board. In this page you can also configurate the device channels.

Keep the text informative and descriptive so it can be used as a user manual and for final project reporting.

1. Open the Actuator Report Page

Click the 8th icon in the right side panel in the Drawing board page of your project to open the Actuator Report page.

[NOTE: You can also find the Actuator Reports of all your projects in the left side panel under Reports > Actuator Reports]

The following Device Types are printed in the Actuator Report. Each type has its own table format.

Type Actuator           

Type General             

Type Gateway           

Type Sensor Relay     

2. Tag the devices according to their function

Mark your devices with a Device Tag. Ex. “R1,R2..” for relays and “D1,D2…” for dimmers.
This tag can be printed in the Group Address name. A tag also makes it easier for the end-customer to understand the report.

3. Review and finalize the channel configurations

Click on a column and fill in the channel configurations.
In the popup window for “Channel Names” you can select the Group Address Set for the channel and set room name, channel text and description.

4. Choose which group addresses to print in the report

Click the Group Address button to select which Group Addresses to print in the report.
To select Group Addresses for individual channels and add comments, click on the Group Address cell for the channel you want to edit.

[NOTE: KNX Group Address is only available for Business and Premium subscriptions.]

Drag and drop channels to rearrange their order.

5. Save and print the report

Click Save when you are finished and Print to create the Actuator Report document for the installer and end-customer.

6. [Optional] Customize the cover for the report

To customize the Actuator Report cover go to system> admin settings> general information> report background. Upload an image that will fill the entire page(A4). The new design will apply for all reports. You can also choose to hide the logo. The text in the foreground will remain as is.

NEED SETUP ASSISTANCE?

Click the link below to schedule a free live video appointment where we will show you how to setup and customize the KNX TOOL for your current projects.

Tags: , , ,

Previous Article

Function Description

Next Article

Purchase Report