Buttons with function Dimming should be connected to a KNX dimming actuator. There is 4 bit and 1 byte Data Format available with this function. With 1 byte dimming there is a slider shown in a pop up window on button press to set the value directly. With 4 bit dimming option, a certain increment/decrement value is send to modify dimmer output.
4 bit:
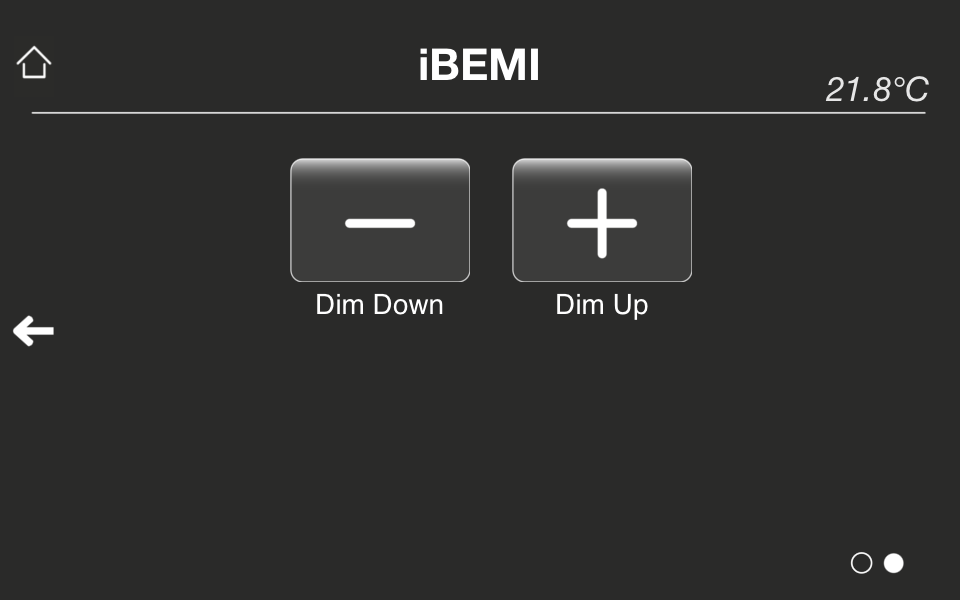 |
You are able to add a Switch Object (1bit) to this function to switch dimming actuator ON and OFF. In this case, the selected dimming value is sent on long press of button – short press is assigned to switching action. The time interval before performing dimming action could be set at “Time between switching and dimming” under More Settings. You could show the current status (ON/OFF) of the connected actuator. The button is adapting state from KNX group address which is entered at entry KNX Address for status indication. This feedback address could be polled – if polling is chosen, KNX Address should be set as readable so that current state could be fetched by the app.
You could set Telegram Repetition option to send multiple telegrams as long as button is pressed. At Telegram Repetition Time you could set time interval in between the telegrams. |
| Attributes | ||
| Name | Name that should be shown beneath button. | |
| Switch Object | You could choose if you’d like to have switching function with this button. | |
| KNX Address switch object | At this parameter you have to enter the KNX group address of switch object (1bit) of the dimming actuator. | |
| KNX Address dimming object | Here yo enter KNX group address of dimming object (4 bit) of the dimming actuator | |
| Command on button release | You can choose which action should be performed on button release. Available actions are Brighter, Darker and Brighter/Darker. | |
| Dimming brighter by
Dimming darker by |
You can select the step width to increment/decrement dimming value on each button press (- or per telegram with option Telegram Repetition set.) Available values are 100%, 50%, 25%, 12,5%, 6%, 3%, 1,5%. | |
| Telegram Repetition Time | Here you are able to add repetition function. You can choose time intervals starting from 100ms to 1s. | |
| KNX Address for status indication | Here at this parameter you enter KNX group address to indicate status (1bit) of the actuator. There is a checkbox to set whether this address should be polled or not. Note: If this KNX Address should be polled, the address should be marked as readable in your ETS project. | |
| Icon | Select icon that should be shown on button. | |
| More Settings | ||
| Icon for active state | Here you could select another icon that would only be shown if status of button is ON. You could also set another KNX address at the field below to control the icons. | |
| KNX Address for controlling the icons | Usually the icons of a button are set according to its status (that is the value at “KNX Address for status indication”). However, if you’d like to control icons independently from status, you could set a special KNX Address (1bit value) here to control the icons. There is a checkbox to set whether this address should be polled or not. Note: If this KNX Address should be polled, the address should be marked as readable in your ETS project. | |
| Time between switching and dimming | If you added a Switch Object to this button, you could set a custom time interval before performing dimming action here. You can choose time intervals starting from 10ms to 1s. Default interval is 300ms. | |
| PIN Secured | Check this option to avoid unauthorised access to this button. If the Secure PIN option is set, you need to enter a PIN before you could use the button. The PIN is set in Profile Settings and can also be easily changed later in iBEMI App Settings. |
1 byte:
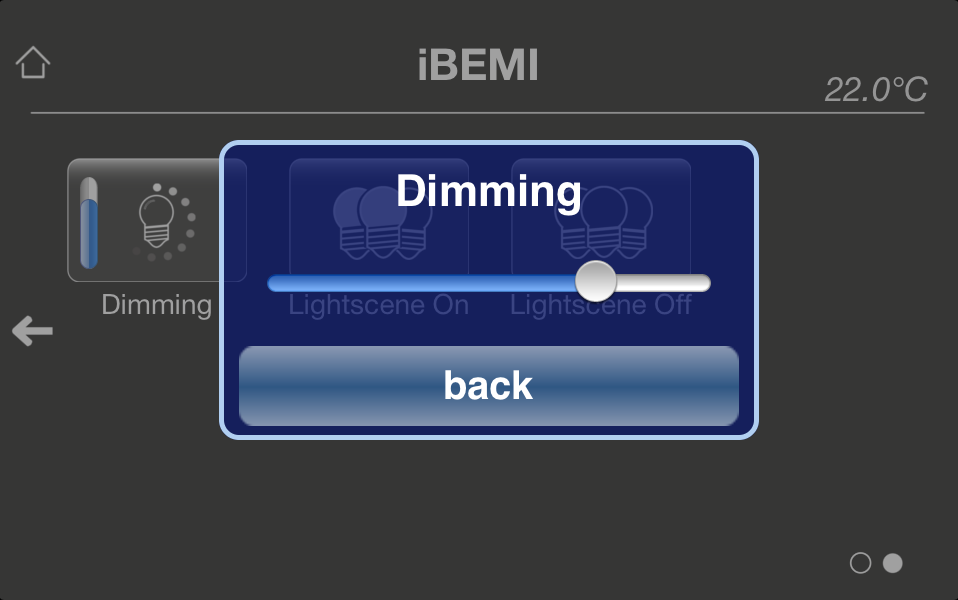 |
You are able to add a Switch Object (1 byte) to this function to switch dimming actuator ON and OFF. In this case, the popup window with the slider to set dimming value is prompted on long press of button – short press is assigned to switching action. The time interval before showing dimming control view could be set at “Time interval before showing control view” under More Settings. You could show the current status (ON/OFF) of the connected actuator. The button is adapting state from KNX group address which is entered at entry KNX Address for status indication. This feedback address could be polled – if polling is chosen, KNX Address should be set as readable so that current state could be fetched by the app. |
| Attributes | ||
| Name | Name that should be shown beneath button. | |
| Switch Object | You could choose if you’d like to have switching function with this button. | |
| KNX Address switch object | At this parameter you have to enter the KNX group address of switch object (1bit) of the dimming actuator. | |
| KNX Address value | Here yo enter KNX group address of value object (1 byte) of the dimming actuator | |
| KNX Feedback Address for value | You can enter KNX feedback address to fetch dimming value. The value at this address is stored for this button. If there is no feedback address available, you should enter address of “KNX Address value” here. There is a checkbox to set whether this address should be polled or not. Note: If this KNX Address should be polled, the address should be marked as readable in your ETS project. | |
| KNX Address for status indication | Here at this parameter you enter KNX group address to indicate status (1bit) of the actuator. There is a checkbox to set whether this address should be polled or not. Note: If this KNX Address should be polled, the address should be marked as readable in your ETS project. | |
| Icon | Select icon that should be shown on button. | |
| More Settings | ||
| Time interval before showing control view | If Switch Object is set, you could set a custom time interval before showing dimming control view here. You can choose time intervals starting from 10ms to 1s. Default interval is 300ms. | |
| PIN Secured | Check this option to avoid unauthorised access to this button. If the Secure PIN option is set, you need to enter a PIN before you could use the button. The PIN is set in Profile Settings and can also be easily changed later in iBEMI App Settings. |